This install is based on a 2000 Z28.
There are basically two ways to swap to LED lights for interior. The easy way, and the harder way. The harder way consists of buying your own LEDs and appropriate resistors, soldering them together, and then soldering them into the bulb holders. If you do this, it would be a pain to go back to stock lighting (bulbs) if you ever needed to. It’s also a very small area to work with and it can be tricky. The easy way is using LED bulbs. They are LEDs with a built in resistor that has a bottom shaped like a bulb, so it plugs directly into the socket. They are affordable (~$1 a piece) and come in many colors.
If you want to make your own things, the best place to buy LEDs is eBay, hands down. Many sellers offer packages that include 100 LEDs with 100 matching resistors for a 12v system – it completely eliminates any guesswork.

This is a regular LED. It has a positive lead, the anode, which is the longer one…and also a negative lead, the cathode, which is the shorter one. When you are soldering your resistor in, it needs to be soldered to the anode as to prevent too much current from burning up the LED.
I highly recommend getting the LED bulbs instead. If you are going that route, you will need (5) #194 bulbs for the cluster, (2) #74 bulbs for the HVAC, and (2) #74 bulbs for the door panels (the lights that shine onto the switches). If you’re doing it the LED way, then obviously you would need 9 LEDs & resistors for this task.
No matter which you decide on, the ASR, foglight switch, and headlight switch will have to be completed by soldering, since the bulbs don’t just plug in. The switches and knob take 3 leds all together.
Switches:
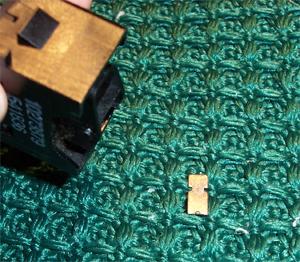
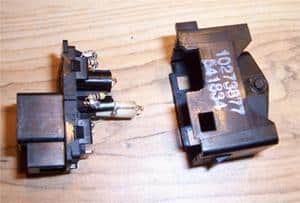
The switches are a bit tricky because they can be difficult to get apart. Before you start tearing them apart, beware that there is a small brass contact which is what ‘clicks’ when you hit the button. If you lose that little piece then you’ll need a whole new switch, GM doesn’t offer the contact by itself.
In the camaro, the switches are easy to remove.
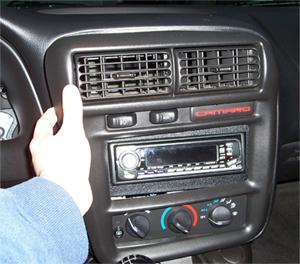
1. Start by removing the trim plate around the headunit. It pulls off. With a flathead screwdriver, pry the switches out of the trim plate and disconnect them from the wiring harness.
2. I suggest doing this next part over a table with a towel on it, so if the contact slips out, it won’t bounce off the table. With a small flathead screwdriver, pry up on one side of the top of the switch, and remove it from the rest. Shake it until the contact comes out on the table and put it in a safe place.

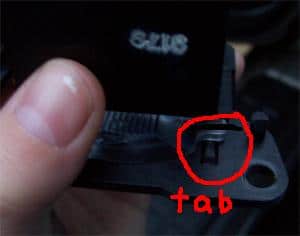
3. Now you need to separate the housing from the switch itself. You’ll see four small tabs holding it together. They are kind of a pain to get off because they don’t ‘give’ very much. Sometimes they break, but its not a big deal. You might want to use a couple flathead screwdrivers to dissemble it, since often one side will snap back on while you’re trying to remove the other.

4. Take note of how the lighted switch works. There are four posts to which the bulbs attach, two positive and two negative. Without a wiring diagram you wouldn’t know which is which, but I’ve already eliminated the guesswork, view my photos of the LED orientation. With a set of pliers, clip off the old bulb. Take your LED/resistor combo and dry fit it. You will have to bend the legs and make the LED ‘sit’ in the little ‘chair’. Try and keep the LED’s legs as far in as possible, or you won’t be able to get the thing back together. Once the LEDs are sitting how you want, solder them to the posts.

5. Now you can take the switch housing and slide it back over the switch itself. Press down very slowly, it will fit a little tight, but should be fine. If it won’t fit at all then you need to re-think how you did your soldering and LED arranging.
6. This next part is a bit tricky, you need to reinsert the brass contact. You can try and put the contact in before you put the housing back on, but I find it’s easier to wait, just for the sole reason that when the switch ‘snaps’ together it will often kick the contact off anyway. The contact is longer on one side than the other, so take note. The shorter side faces in. Slide the contact in on its back, and then with a small awl or screwdriver, carefully flip it onto its stand, and move it around until it seats. This will make more sense when you see it for yourself.
7. Carefully press the top of the switch back onto the housing. It has a little white ‘arm’ that is actuating the brass contact when you press on the switch. If you press it together slowly, the contact will stay in place. If you mess up don’t worry. Shake the switch til the contact comes out again and repeat #6.
8. Now you can reinstall the switch into the car, and enjoy the pretty new color.

Headlight Knob:
You will need one LED and one resistor to change your headlight knob color.
1. Take a look at the trim surrounding the headlight knob. Like the headunit trim, it pulls right off. Behind it are two 7mm bolts, remove them.

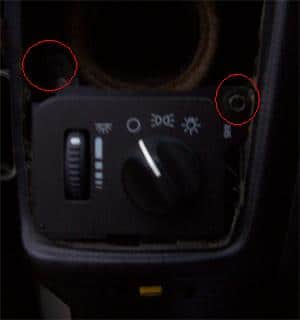
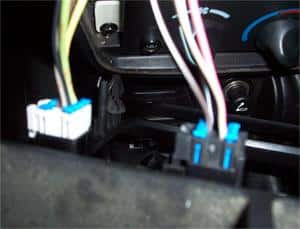
2. Disconnect the knob switch and dimmer switch from the wiring harnesses, then remove the dimmer switch. It is held on by two tabs on either side…pry them up and slide it out.
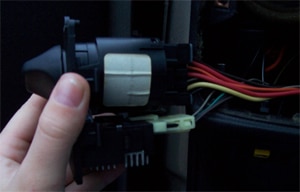

3. Now you are looking at the switch, which you will break down into four pieces. There is a clear light refractor, the switch body, the knob itself, and the trim piece that keeps it all together. The knob pulls off and is indexed so that it may only go on one way. If you look near the end of the clear light refractor, you’ll see a little push tab holding it in. Push it down and slide the refractor out.
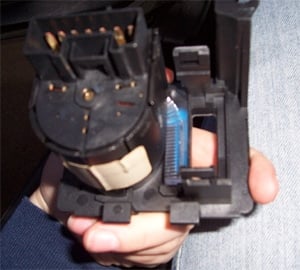
4. Simply turn the headlight switch assembly to remove it from the trim piece. On the switch itself you will see the little bulb which is providing light. Clip it out as best as you can. It is a good idea to scratch up the surface a little bit so the solder has something to stick to, otherwise it breaks off pretty easily. Solder your resistor in front of the anode. Now you have to insert it into the trim piece in such a way that it won’t be hit by the light refractor when you put it back in. I put my resistor above, and the LED below. In the end it will look like the below photograph…

5. Now you can reassemble the switch. Slide the switch into the trim piece and turn it back together. Slide the refractor in and make sure it clears the LED. Then add the knob, and it is ready for installation back into the vehicle.
HVAC & Door Panels
Hopefully you opted for the ‘easy’ way to take care of these last two items, using LED bulbs. The nice thing about these little bulbs is that they are all ready to go and plug in perfectly where your old bulbs when. If you insert them and they didn’t illuminate, just rotate it 180 degrees and try again. If you opted to make your own, you can just slide the LED legs into the bulb holders…put a dab of solder on them to keep them in place.
HVAC
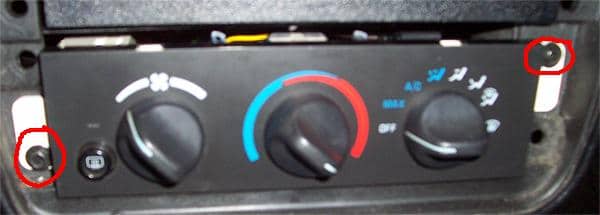
1. If you haven’t already, pull the trim panel off. Behind it you will see that the HVAC unit is held on by two 7mm bolts, remove them.
2. This modification can normally be performed without even disconnecting the wiring harnesses, but if you need more room, feel free to do so. At the top you will see two small bulb holders. They come out by twisting.
3. Inside each holder is a tiny #74 bulb. Most of the time they are stuck in there pretty good, and will break when you take them out. It happens a lot – you just need to dig out the glass pieces out of the bulb holder. Either disconnect the battery or remove the bulb holder from the car when you do this so you don’t short anything out. You may need to chip away at it with a small screwdriver to clean it all out.
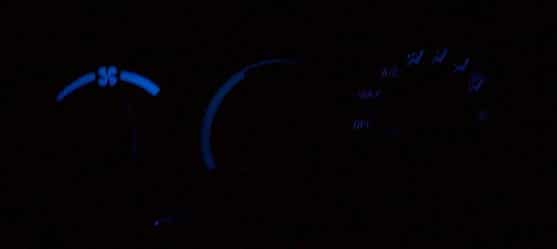
4. Now insert the #74 bulb. Turn the lights on. If it didn’t light up, turn the bulb the other way. If it still doesn’t light up, check the fuse for the lighting, it may have blown accidently.
5. Twist the bulb holders back into place, reinstall the HVAC’s two 7mm bolts, and enjoy. (sorry, not the best pic)